
Ever looked at a room in your home and thought it desperately needed a fresh coat of paint? Many homeowners get excited about the idea of a makeover but falter when it comes to the actual process. Painting a room can seem daunting, especially if you’re unsure where to begin. With countless color choices and technical details like finishes and primers, it’s easy to feel overwhelmed.
But don’t worry! We’re here to guide you through the painting process from start to finish. This article will help you plan effectively, choose your materials wisely, and apply your paint effectively so you can enjoy a professional-looking painted room without unnecessary headaches.
How to Start Painting a Room: Step-by-Step Process
Step 1: Assess and Plan Your Project
First things first, take a good look around the room you want to transform. Think about the mood you want to create and consider whether you’re leaning towards bright colors or dark paint colors. For some help, use paint samples on your walls.
This helps you see what looks best in your space’s natural light. Don’t forget to measure the square feet of your walls to figure out how many gallons of paint you’ll need. This step helps you avoid buying too little or too much paint and can help you save both money and effort.
Step 3: Choose the Right Finish
Picking the right paint finish is crucial for achieving the look and durability you want in your room. The finish affects not only the appearance but also how well the paint stands up to cleaning and wear.
Here are some common types of paint finishes you might consider:
- Flat Paint. Flat paint has no shine and is perfect for hiding wall imperfections. It offers a smooth, matte look but can be more challenging to clean. This is ideal for low-traffic areas.
- Eggshell Finish. This finish has a slight sheen that resembles the surface of an eggshell. It’s more washable than flat paint, making it a good choice for living rooms and bedrooms.
- Satin Finish. With a soft, velvety sheen, satin is both durable and easy to clean. It’s great for high-traffic areas like hallways, kitchens, and bathrooms and provides a stylish yet practical option.
- Semi-Gloss Finish. Semi-gloss finish is highly durable with a radiant shine. It’s ideal for trims, doors, and spaces that require frequent cleaning, as it can handle moisture and scrubbing well.
- Gloss Finish. Gloss paint is the shiniest and most durable option. It works well for highlighting architectural details or furniture, though it can reveal surface imperfections due to its reflective nature.
Step 3: Gather Your Materials and Tools:
Before starting your painting project, having the right tools and materials ready is important. This preparation will save you time and ensure a smooth, hassle-free experience.
Here’s a handy list of what you’ll need:
- Paint bucket
- Paint rollers and roller frame
- Roller cover
- Paint tray
- Paintbrush
- High-quality paint
- Drop cloths
- Painter’s tape
- Putty knife
- Soapy water and warm water
Step 4: Prepare the Room and Walls
Preparation is the key to avoiding painting mistakes. Start by clearing out as much furniture as possible or move it all to the center of the room, covering everything with drop cloths.
Now, clean your walls using soapy water and warm water to remove dirt that could affect paint adhesion. Smooth out any cracks or holes in the walls with your putty knife. Then, use painter’s tape around edges, fixtures, and trims for sharp, clean lines. Removing any light fixtures is also a great idea so they don’t get in your way when you start to paint.
Step 5: Prime the Walls
So, why prime? Well, priming creates a perfect surface for your paint, especially if you’re covering dark colors with lighter colors. It’s an extra step that helps paint stick better and last longer. Pick a primer compatible with your type of paint, like latex paints, for general use. Apply a thin, even layer and let it dry thoroughly for a perfect finish. It might seem like extra effort now, but it pays off with fewer coats of paint later.
Step 6: Start Painting the Ceiling
When you begin painting, tackle the ceiling first. This method prevents any wet paint from dripping onto freshly painted walls. Use an extension pole attached to your roller frame to reach high spots comfortably. A paint roller works well for this, but if you have one, a paint sprayer can give you a really even coat. Take your time and use smooth, even strokes to avoid streaks. Once the ceiling is dry, you’re ready to move on to the walls.
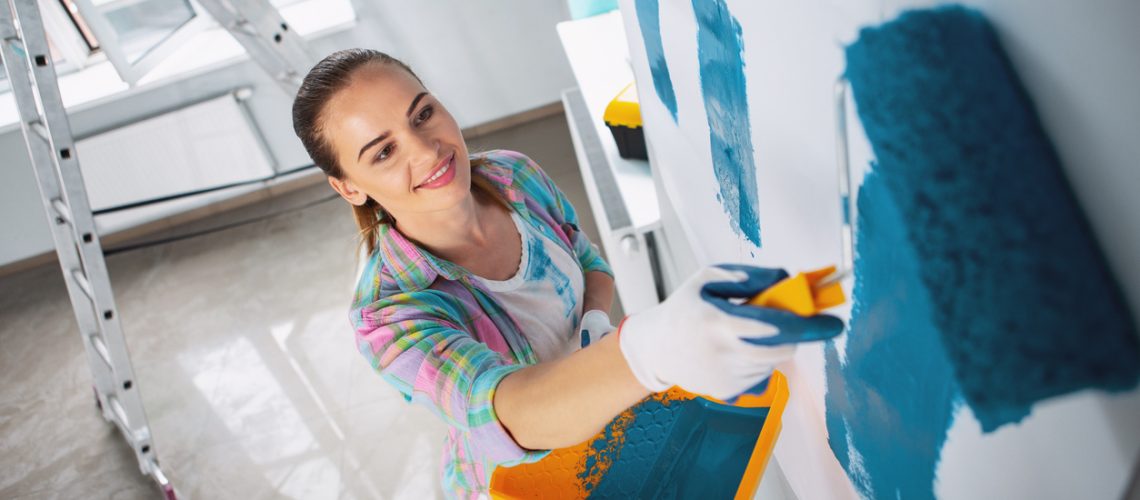
Step 7: Paint the Walls
Start by cutting in edges with a paint brush, then use your paint rollers and begin with broad strokes from top to bottom. Dip the roller into the paint tray and roll off any excess paint before applying it to the wall. For a professional finish, aim for two coats of paint but make sure to let each one dry in between. This step brings ensures full coverage and a beautiful, even appearance for your walls.
Step 8: Finish With the Trim and Details
Lastly, it’s time for the trims and finer details. This part will complete the look of your room. Use a smaller paint brush for window trim and baseboards. Trims get painted last to tidy up any overlap from the walls. Remove the painter’s tape carefully only after the paint cures to avoid peeling. Once it’s all dry, take a step back and enjoy the fresh feel of your newly painted room!
Signs It’s Time to Repaint Your Home’s Interior
Repainting your home’s interior can breathe new life into your space and offer a fresh start. But how do you know when it’s time for a change? Here are some clear signals it might be time to grab some paint supplies and give your home a new look:
- Fading Colors. Over time, sunlight and time can dull even the brightest walls. If your once vibrant paint color now appears washed out, it might be time for a refresh to bring back the room’s vitality.
- Peeling or Cracking Paint. If you notice paint starting to peel or crack, it’s more than just an eyesore. These issues can expose the walls to moisture and damage, indicating the need for a fresh coat of paint.
- Persistent Stains. When stubborn stains don’t budge despite your best cleaning efforts, painting over them is a simple solution. A fresh coat can effectively cover these blemishes and leave your walls looking clean and new.
- Desire for a Change. Sometimes, you just need a change to freshen up your outlook. Whether you’re tired of the existing paint color or simply want to try something new, repainting can transform the entire feel of your space.
- Outdated Look. Interior trends change, and a color that was in style years ago might not match today’s preferred aesthetics. Updating your walls with more contemporary, high-quality paints can instantly modernize your room.
What Part of a Room Should Be Painted First?
When you begin a painting project, always start with the ceiling. This allows any drips or paint splatters to fall onto unpainted surfaces and prevents the need for touch-ups on freshly painted walls.
Once the ceiling is done, move on to the walls. Use paint rollers for larger areas and a paintbrush for the edges. After the walls are complete, finish with the trims and details like window frames and baseboards. This order not only simplifies the process but also helps achieve a clean finish throughout the room.
Essential Painting Tips and Techniques for Interior Walls
- Use a Quality Roller Cover. Invest in a good roller cover to apply paint smoothly and evenly. It helps distribute paint across the wall without leaving streaks and helps speed up the whole task.
- Stir Paint Thoroughly. Before you start, mix your paint well with a sturdy stick. This keeps the color consistent by evenly distributing pigments and other components throughout the paint bucket.
- Apply Painter’s Tape Carefully. Tape around trims, sockets, and edges to keep your lines sharp and avoid mistakes. Press the tape down with a putty knife to prevent any paint bleed underneath.
- Load Your Paint Tray Properly. Pour enough paint into your paint tray to cover the bottom ridge. This ensures that you’re not dipping too deep—which could cause drips and excess paint on the roller frame.
- Use Long, Even Strokes. Roll using long, even strokes to cover large areas. This method helps spread the paint more evenly and reduces the appearance of overlap marks on the wall.
Let the Experts From Vork Brothers Painting Handle Your Next Project!
Painting a room may feel overwhelming at first, but breaking it down into simple steps can be helpful. Remember to plan, prep, and work in the right order to avoid common headaches. With the right tools and techniques, you can achieve a beautiful, smooth result you’ll love. And if any mistakes or bumps come up, remember that even the best painters learn from each project.
When a perfectly painted kitchen is what you’re after, Vork Brothers Painting is ready to step in. Serving the West Michigan area, we bring a positive, professional attitude to every project, big or small. Whether it’s a fresh coat for your home or a professional finish for your office, we have the skills and experience you need.
Want a flawless, professional finish? Let Vork Brothers Painting do the hard work for you. Contact us today to get your free quote!
